ようやくボイラーとフランジの分解が終わりました。
前回の記事はこちらです。
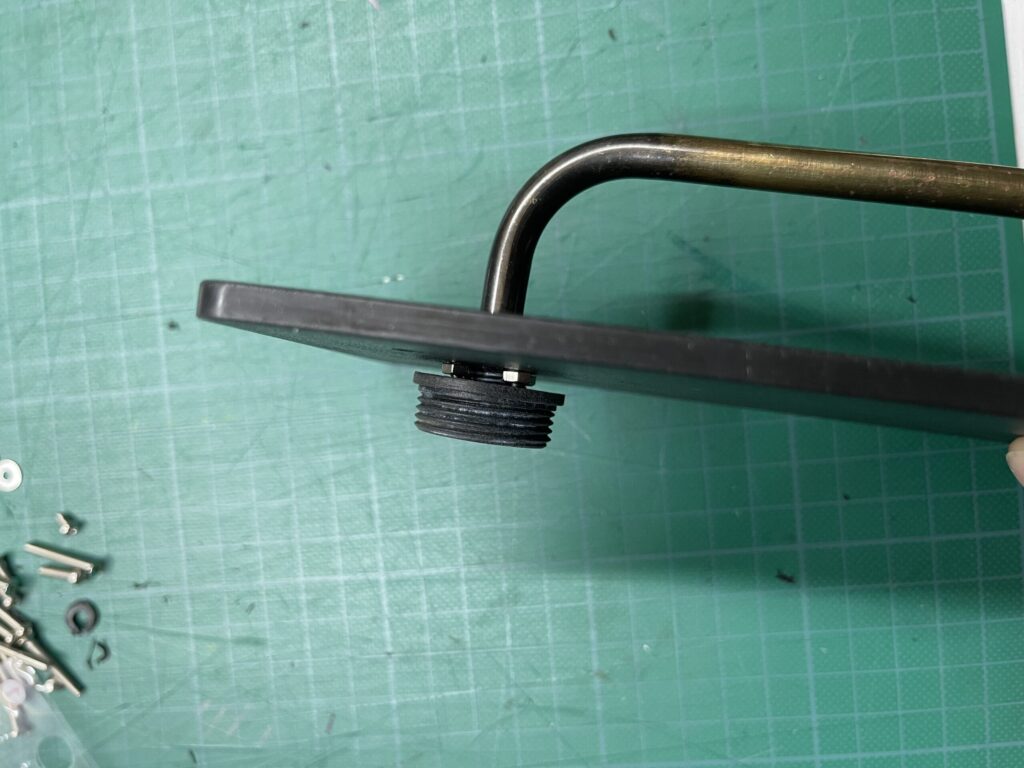
次に取り掛かったのが、ボイラーとグループヘッドの接続部分。
結果から言うと無事とれたのですが、ここにも試行錯誤がありました。その部分をわかりやすく解説したいと思います。
ヒートアイソレータとグループヘッドが取れない・・・
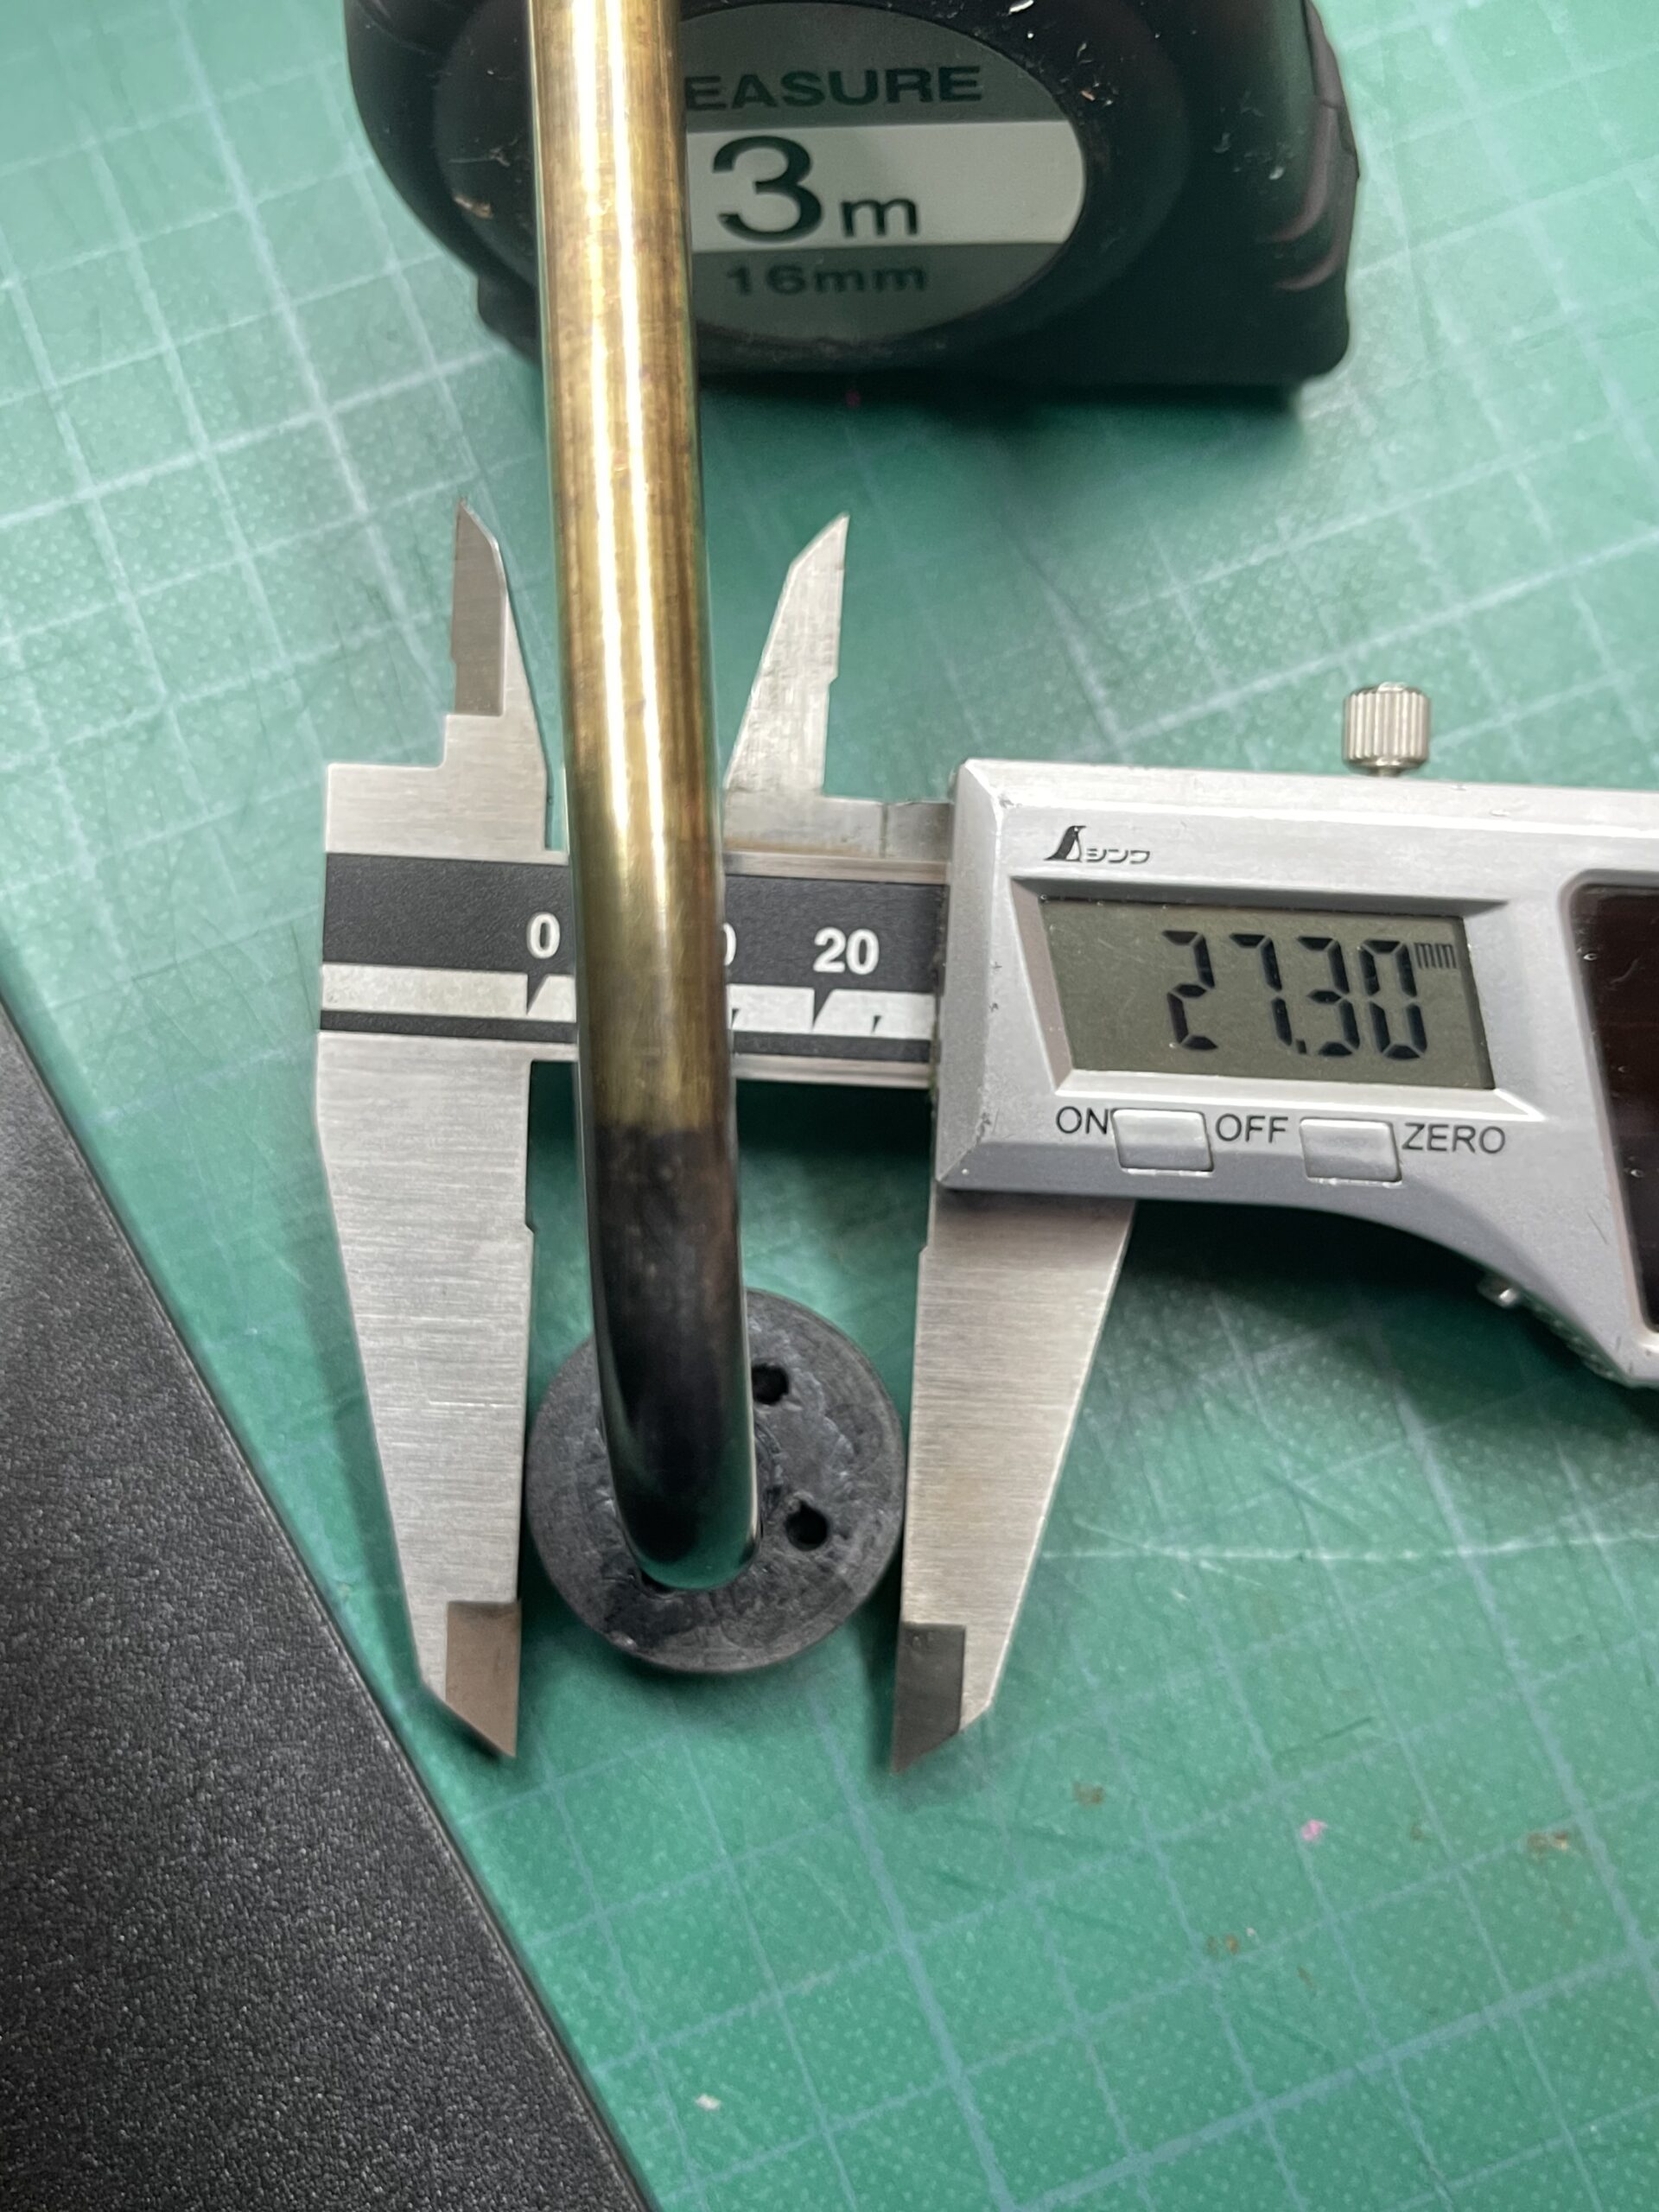
金属パイプはとれたのですが、このプラスチックのところが意外と固く、またしても滑り止め付きのゴム手袋で思いっきり回してみるが取れません。
適当にやるとヒートアイソレータが壊れる可能性あり
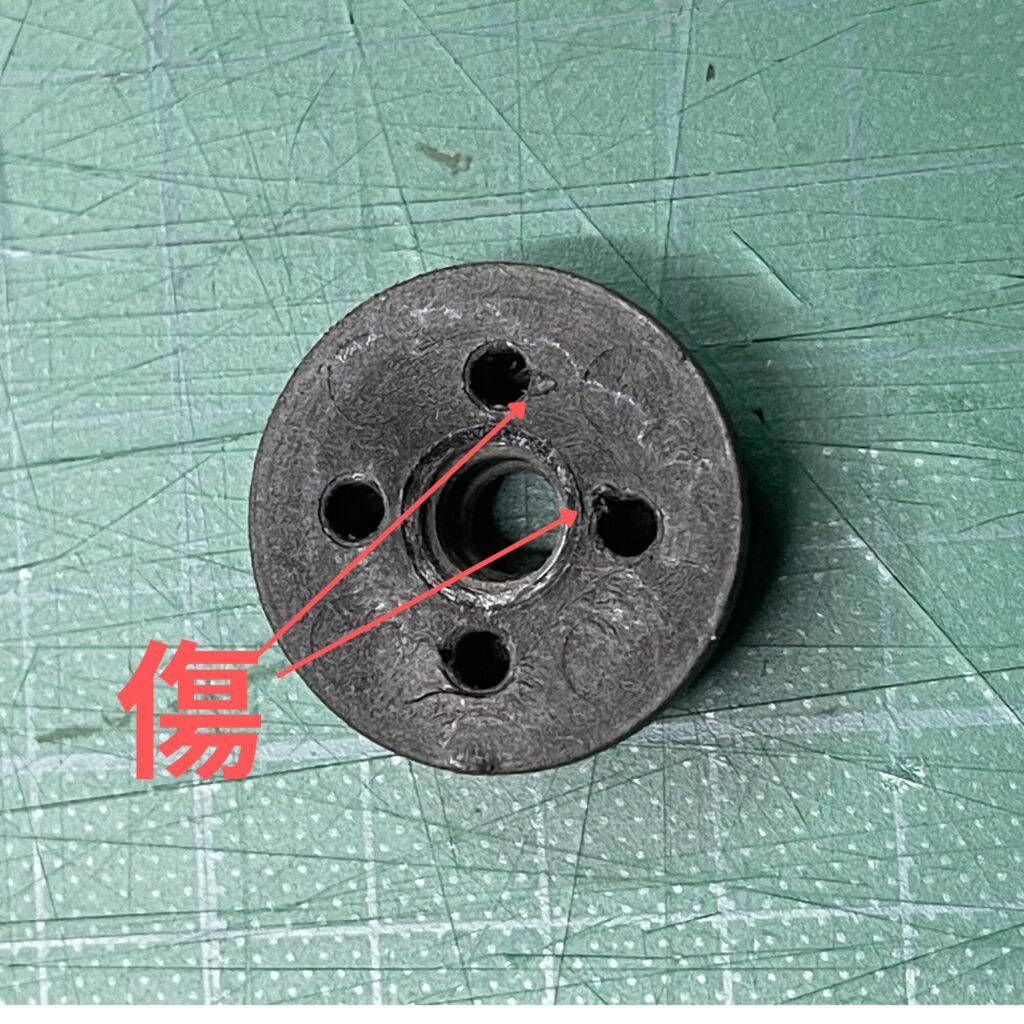
自宅になぜかあった鉗子で4つの穴のうちの2つに入れて、回してみるけど、うまく回らず、鉗子が壊れてプラスチックに傷が入っただけでした。
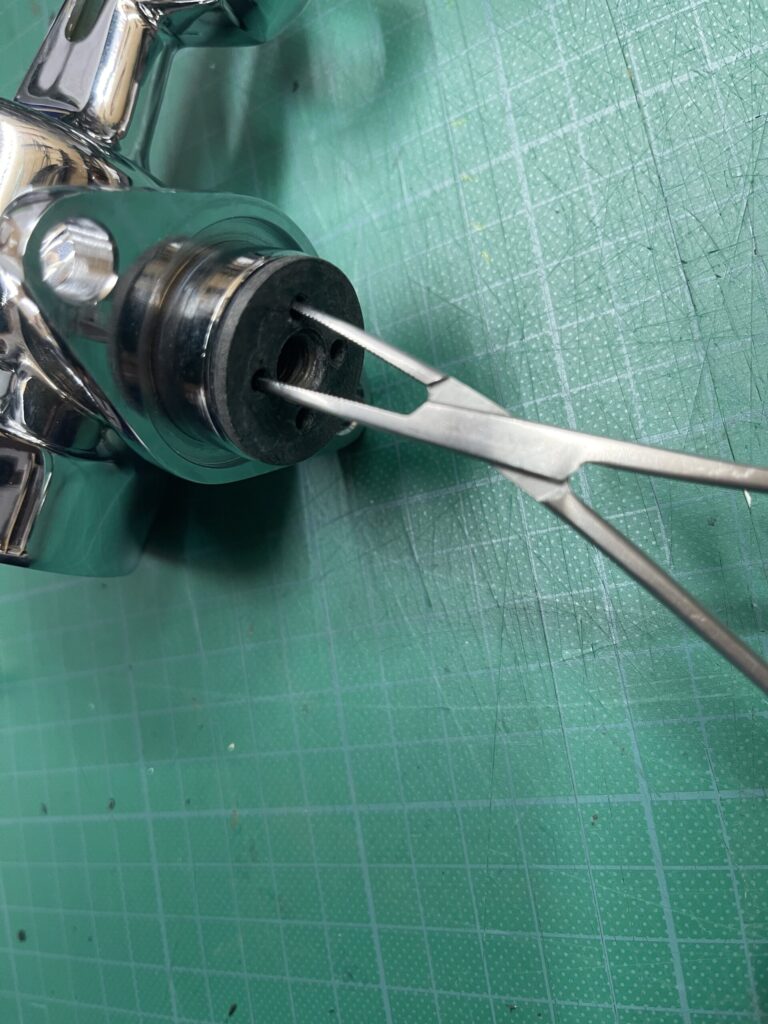
ちなみに鉗子は壊れて、かみ合わなくなり、力ずくで変形させもとにもどしました。
これも取り外すための工具があるのか調べてみると、やっぱり存在しました。
La Pavoni Lever Boiler Pipe Connector removal tool stainless
でも3500円もする割と高価なもの。
とりあえず金属パイプをヒートアイソレータに入れなおして、再度外してみると、今度はヒートアイソレータと金属パイプがくっついている。
んで、結局手袋でも外れない。
フランジを外すときほど難しい工具じゃないし、壊れても嫌なので、また治具を作ろうと再度ホームセンターに向かう。
For English Speakers: After removing the boiler flange, I faced another challenge: the Heat Isolator and Inlet Pipe were fused together and stuck to the group head. I created a custom DIY jig using a 5mm plastic plate and M2.6 screws to safely remove them without buying the expensive $25 stainless steel tool.
Disclaimer: Attempt this at your own risk. Plastic plates may crack under high torque. Metal plates are recommended for better durability.
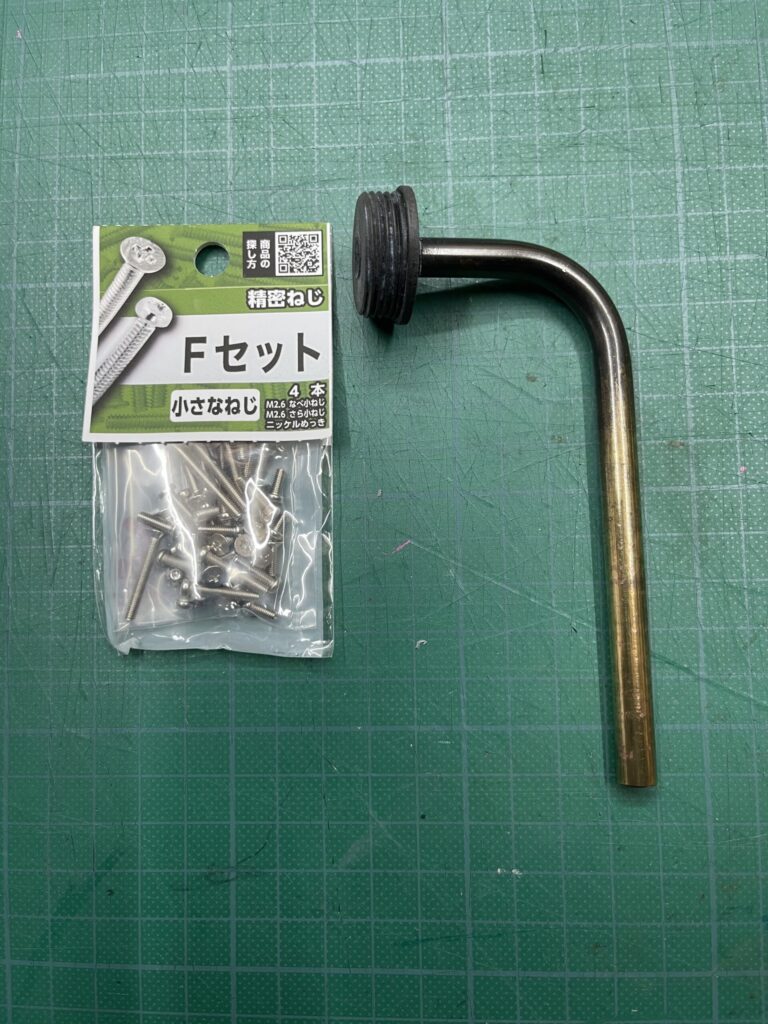
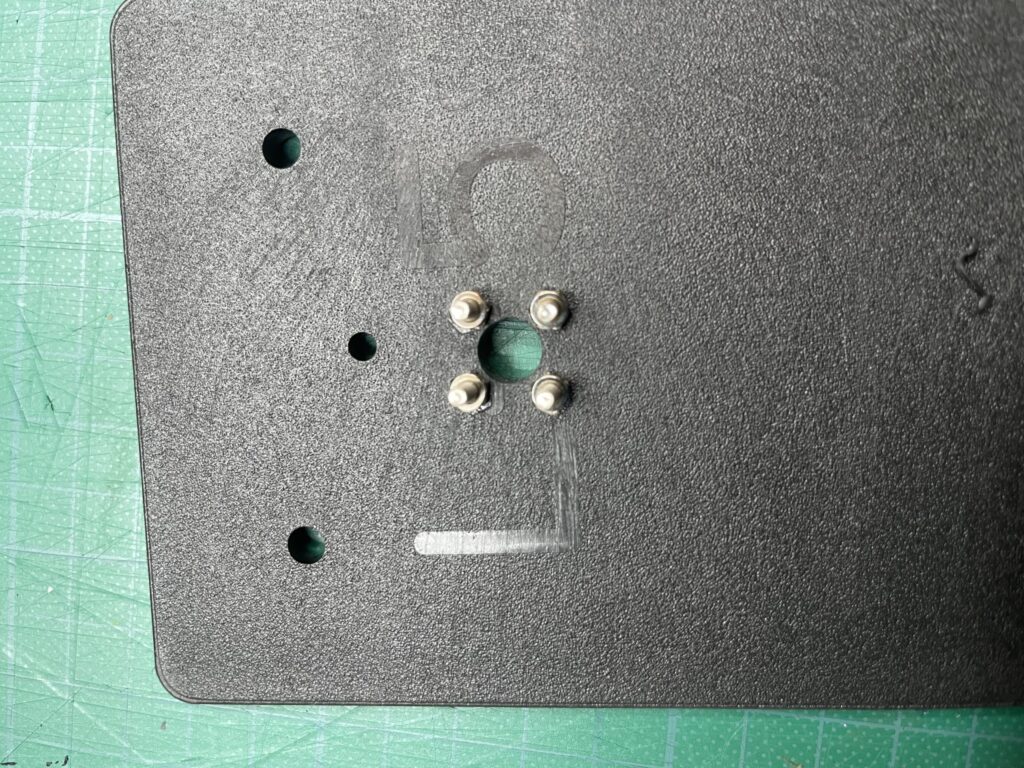
用意するのはネジと丈夫なプラスチックの板
手ごろな厚さ5㎜のプラスチック板と4つの穴に入りそうなネジを買ってきました。
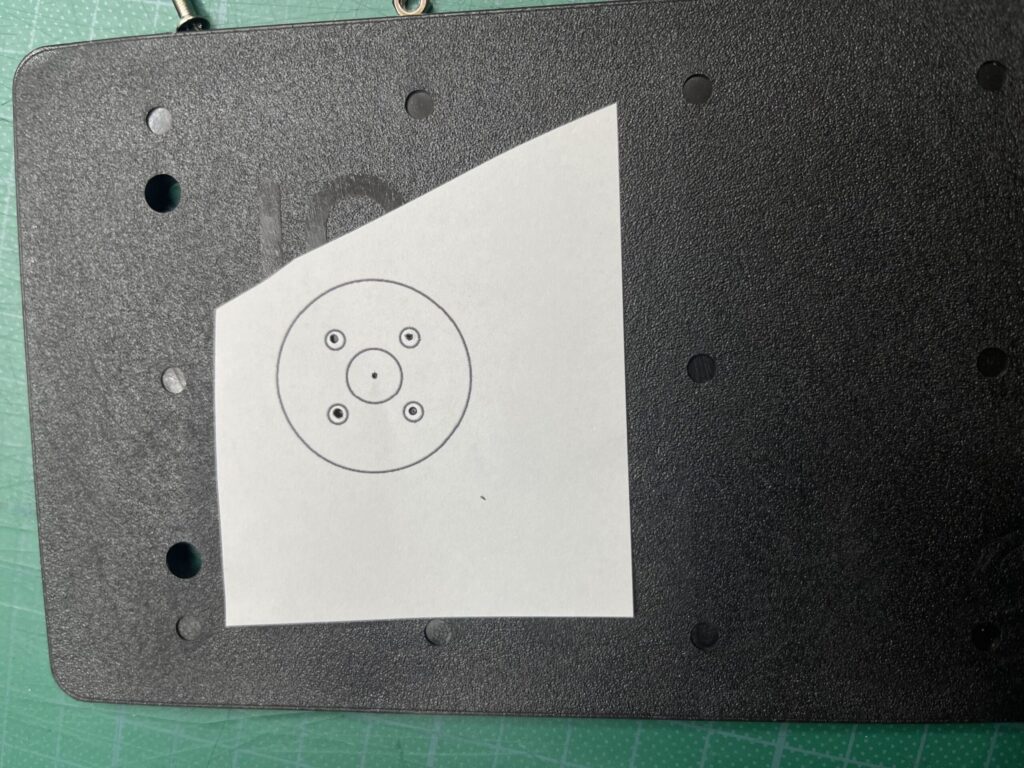
そして、大体の穴の位置を把握し、Canvaで作図しました。
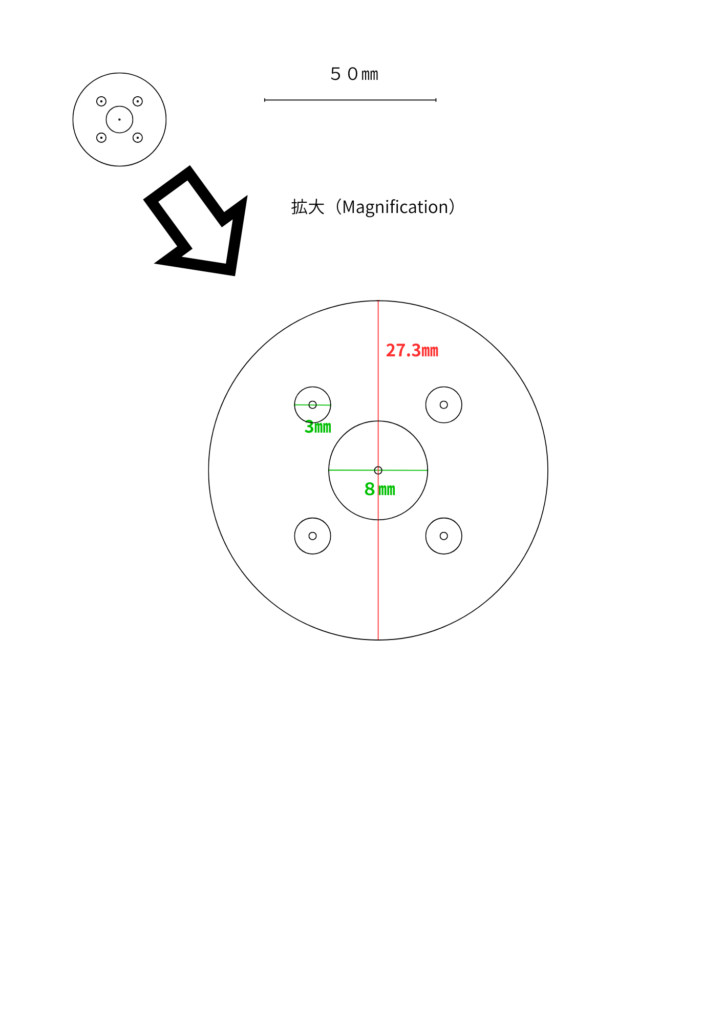
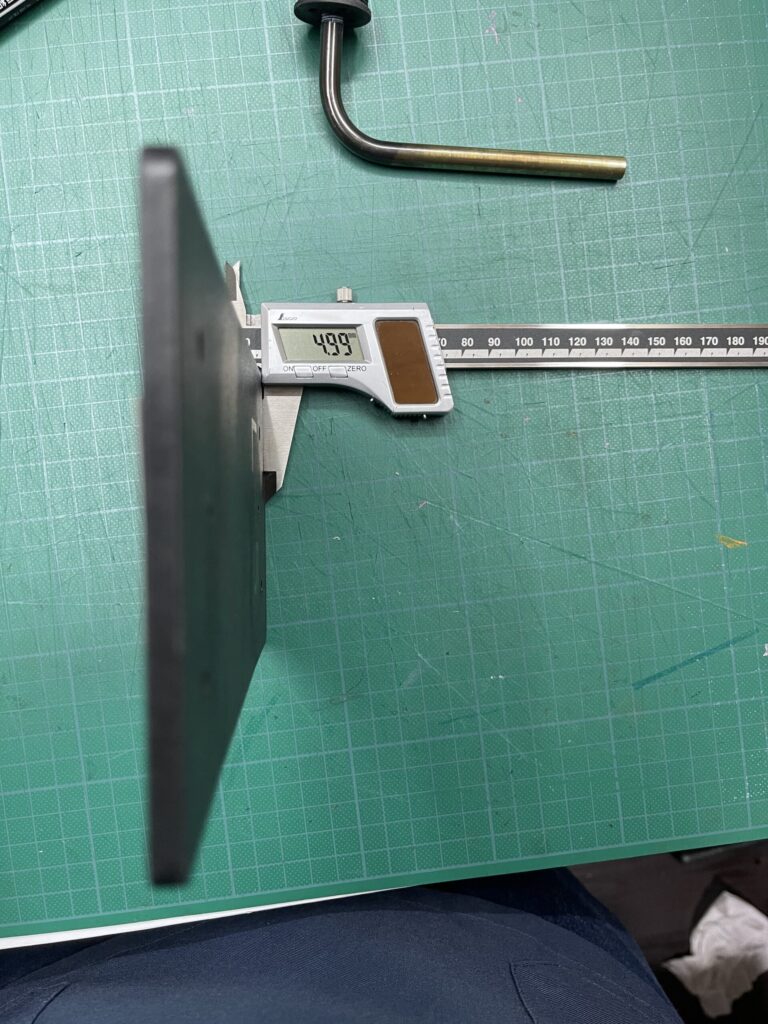
印刷してみると、プリンタの設定次第ですがかなり正確に印刷することに成功!
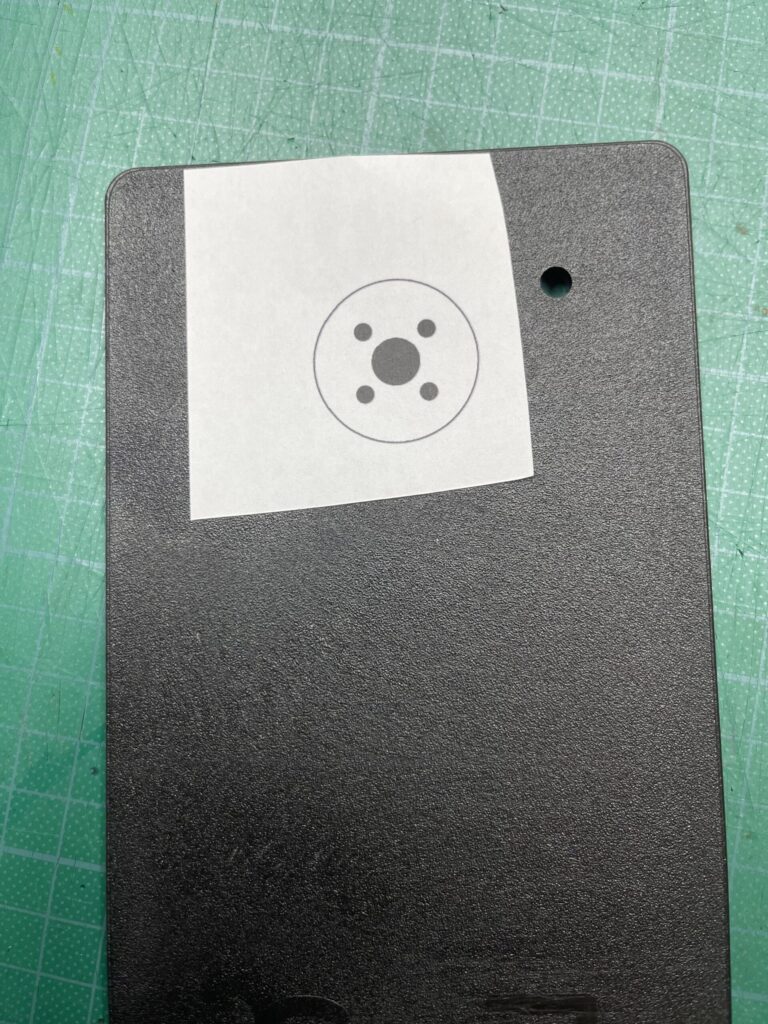
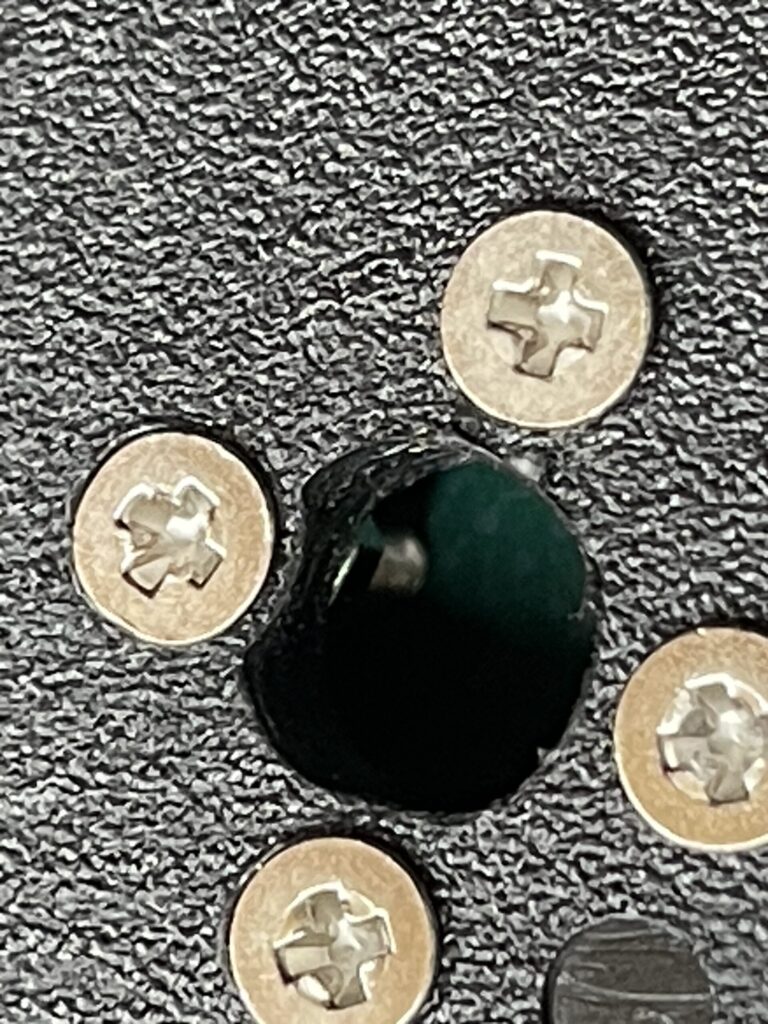
これを写真のようにしるしをつけて、直径9㎜で中心円にドリルで穴を開ける。4つの穴は下穴キリで直径2.5㎜の穴を開ける(ここはギリギリの大きさが良いです)。
Precision is Key: Ensure the four holes for the M2.6 screws are aligned perfectly with the holes on the isolator. A 2.5mm drill bit provides a snug fit.
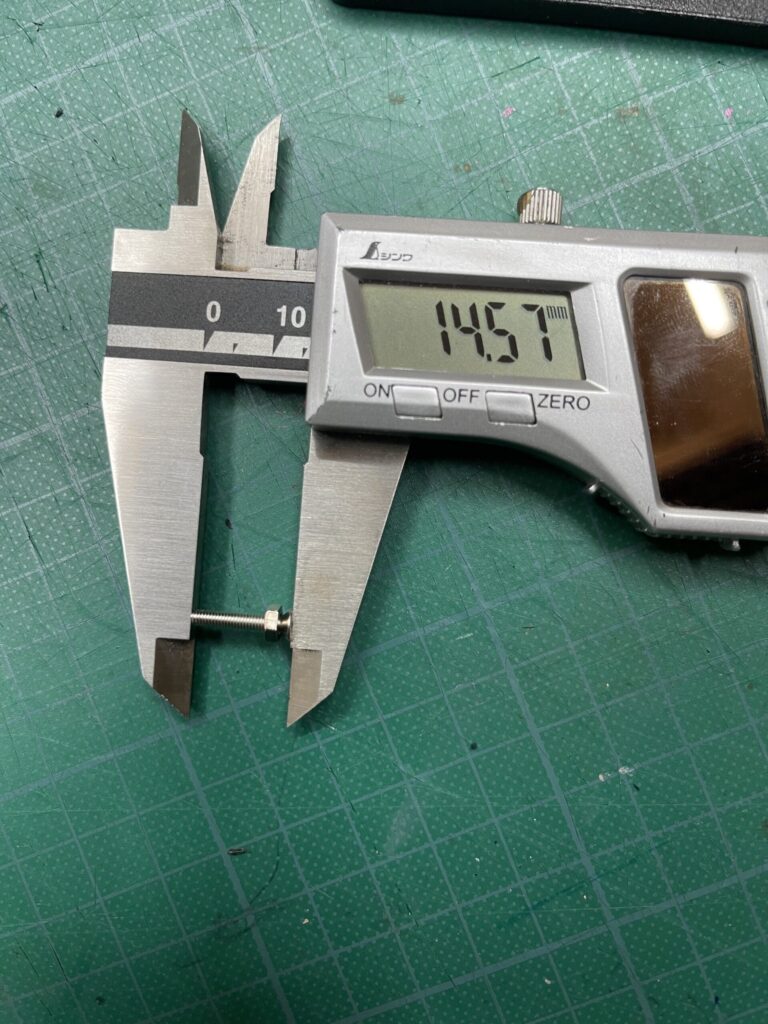
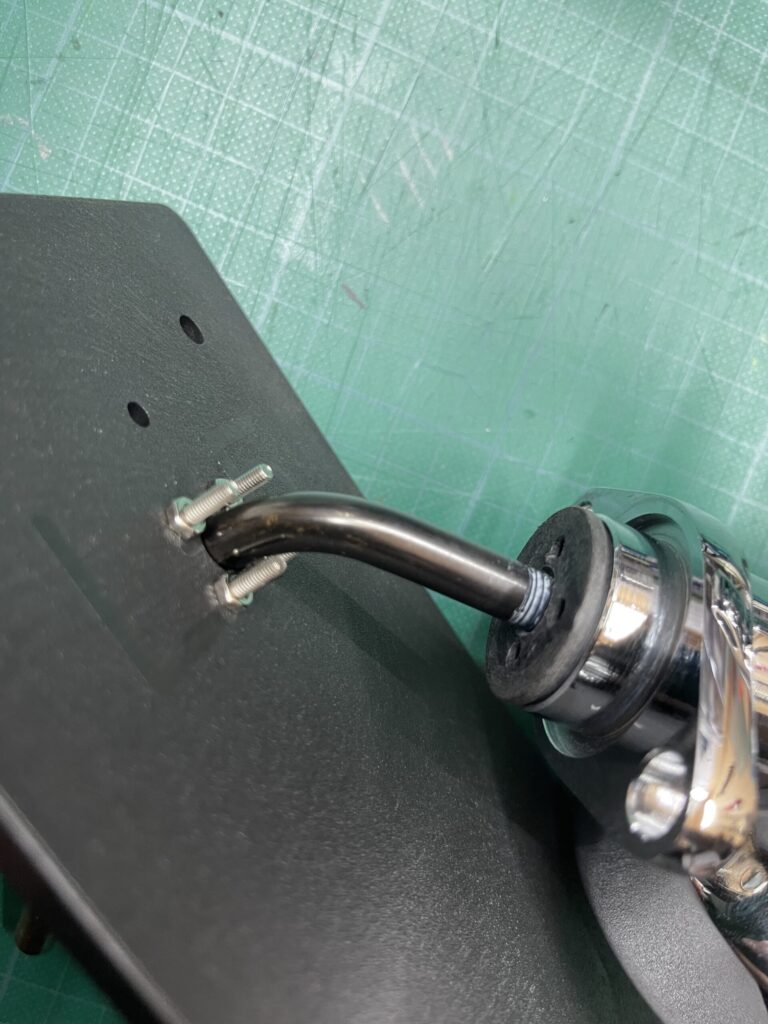
長さ14.5㎜のM2.6サイズのネジを通してナットとワッシャーで止めるといい感じだったんですが・・・
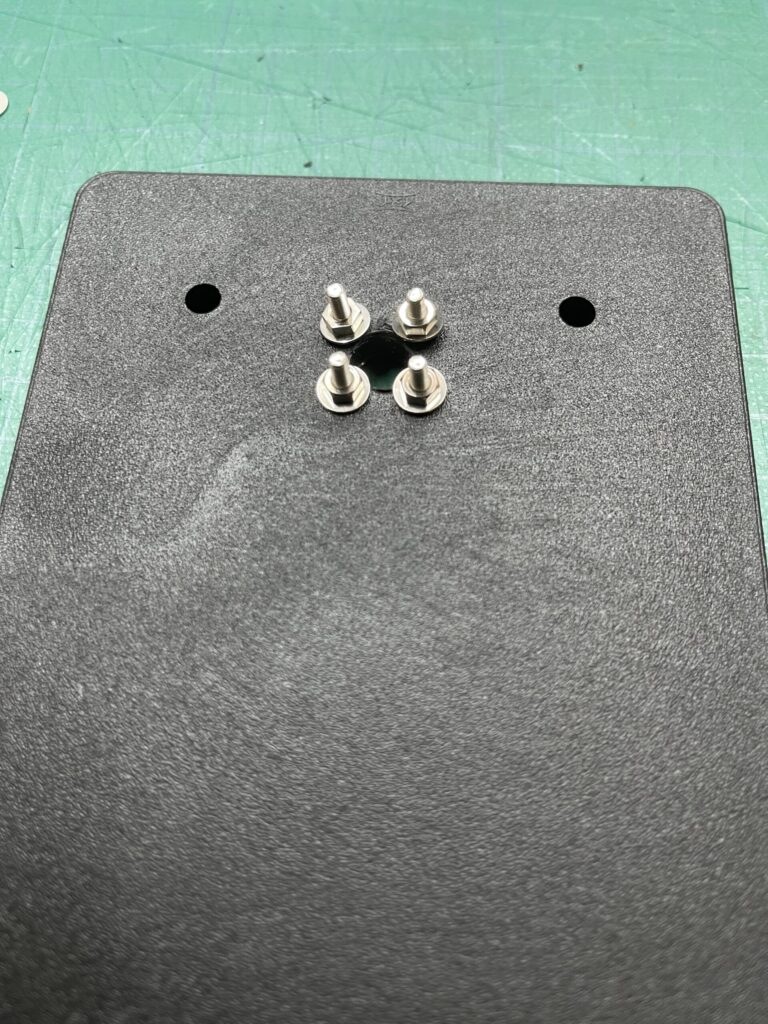
試しに使ってみると、ワッシャーが邪魔して、金属パイプが中心の穴を通らない。
仕方ないのでワッシャーを取り外して、再度組み立ててみた。
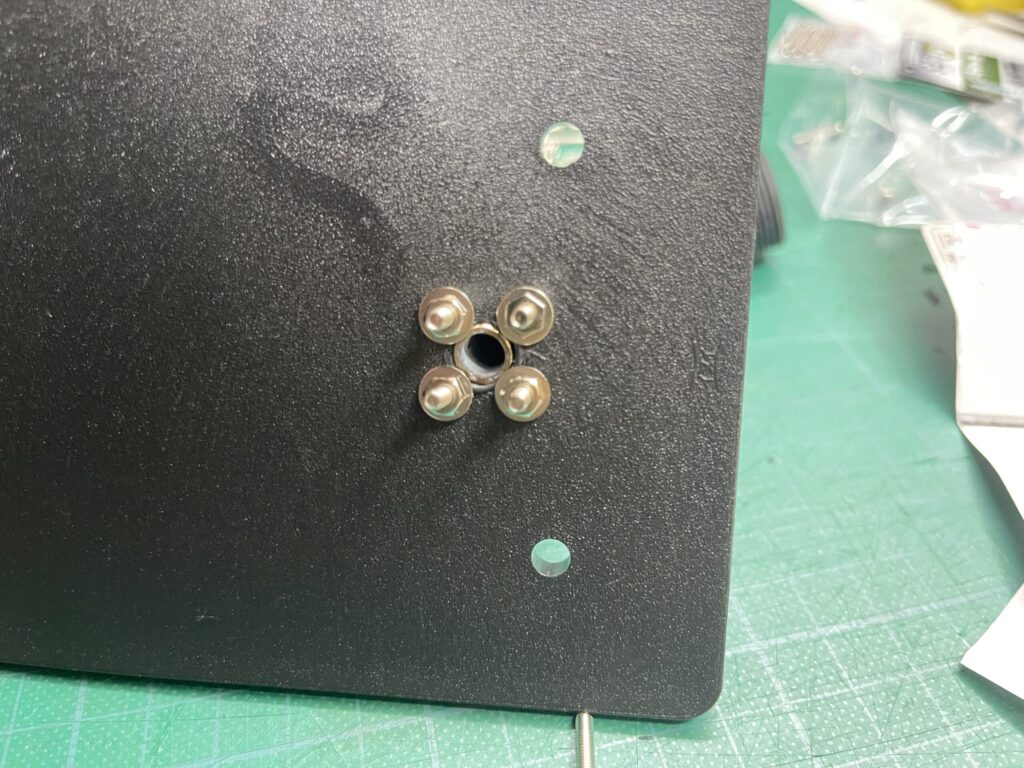
今度はしっかりヒートアイソレータに密着できるようになったので、これで完成!
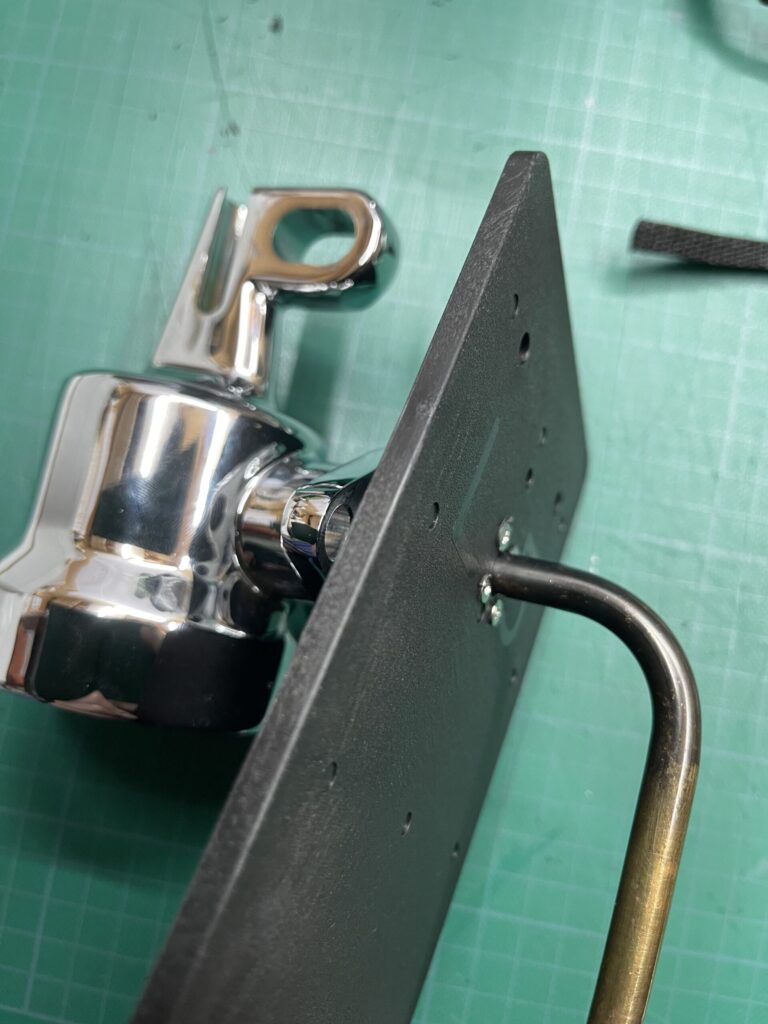
しかし、ネジの締め上げが悪く、ちょっとぐらぐらしていたので、しっかり締め上げると・・・
あれっ?金属パイプが通らなくなった。
よく見てみると、プラスチックが中心の円にせり出してきて、中心の円が小さくなっていることに気が付く。
The Center Hole: The center hole (9mm) must be accurately positioned. If the screws are tightened unevenly, the plastic plate may warp, making it difficult for the metal inlet pipe to pass through.
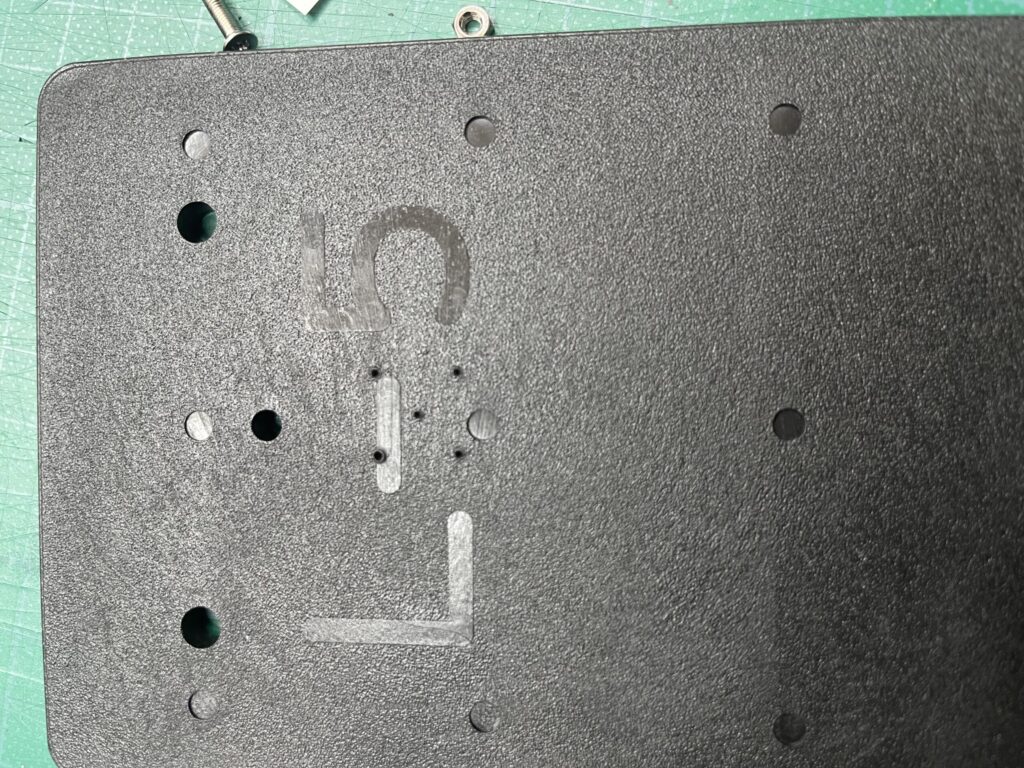
先ほど使用した模式図は穴が全部真っ黒で中心がわかりづらく、微妙にずれていたこともあって、歪んでいました。
再度模式図を修正し、今度は正確に穴を開ける(上にある模式図はすでに修正版です)
Durability: If you have the tools, using a steel or aluminum plate instead of plastic will significantly increase the tool’s lifespan.
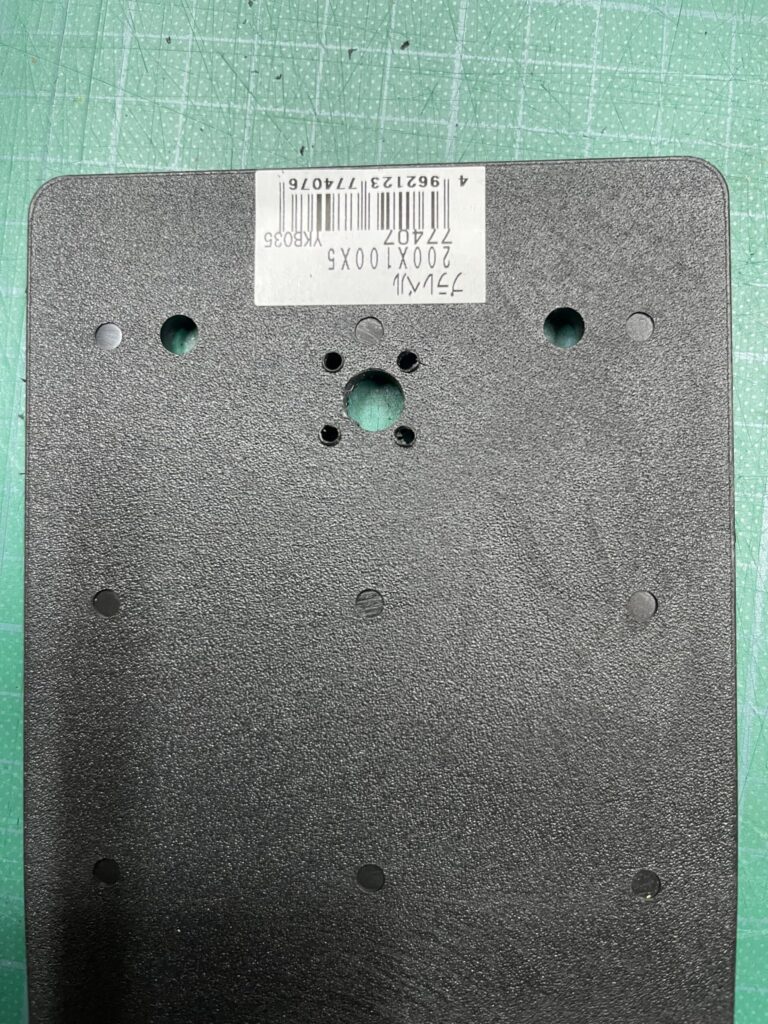
ようやく完成。ジャストフィット!
ヒートアイソレータ―がグループヘッドと固着する場合にも使用できますが、La Pavoni Lever Boiler Pipe Connector removal tool stainlessと違いこれはヒートアイソレータと金属パイプが固着してしまったときにも使用できる優れものです。
ちょっと耐久性が低いのが難点ですが、その場合は中心の穴を開けずにすればいいんだと思います。
もし、金属加工の技術があれば、鉄板でつくるのがベストだと思います。
DIY Removal Tool Guide:
- Preparation: Prepare a 5mm thick plastic (or metal) plate and four M2.6 screws (approx. 14.5mm length) with nuts.
- Drilling: Use the template to drill a 9mm center hole and four 2.5mm holes for the screws.
- Assembly: Insert the screws into the plate and secure them with nuts. (Remove washers if they interfere with the center pipe).
- Operation: Align the screws with the four holes on the Heat Isolator. Insert the tool and rotate to break the scale and loosen the parts.
- Pro Tip: If the metal pipe won’t fit through the center hole, check if the plate is warping from overtightened nuts.